Showing posts with label warm and cuddly. Show all posts

02 January 2013

Creamy Parmesan Orzo

It occurs to me that people have an odd idea of what a "staple" is. No, I don't have butter on hand, but I do have four different bottles of balsamic vinegar. Other items I don't have: bread (I hold the bacon in my hand), mayonnaise (it's gross and should never be used as a hair conditioner no matter what the women's magazines tell you), cheese (because cheese addicts shouldn't keep it in the house). My pantry/fridge is not all bacon and balsamic mind you, I have a copious amount of Greek yogurt, marzipan shaped like fruit, 10 microwave vegetable lasagnas....

But when I'm not eating directly from the fridge or microwave this creamy, Parmesan orzo is a nice New Years treat. The recipe is great for practicing various beginner cooking techniques and only requires a little patience and the ability to focus. FOCUS, do not check your phone or computer. Or make tea.

Important cooking skills like sharpening your knife, chopping veggies roughly the same size, rendering fat, sweating vegetables, deglazing, focusing (side note: I only have one knife, one pot and one cutting board and hate cleaning dishes so one-pot dishes are my bff).


The key to cooking risotto-like orzo, sweating the onions and rendering the bacon are keeping the heat low. I have the tendency to go medium/high for everything and felt pretty zen after keeping it low and chill for so long.

Globs of butter, crispy bacon, creamy cheese, warm pasta, umami-rich wine and mushrooms and a hint of dill.
Recipe Time: Creamy Parmesan Orzo
recipe as given, my substitutions in {}
2.5 quarts
1 hour-ish

1lb Orzo
3/4 lb shiitake mushrooms {baby bella mushrooms}
1 large sweet onion, medium dice {3 small yellow onions}
Stick and a half butter {1 stick unsalted butter}
1 cup white wine
1½-2 cups water {2½ C hot water}
2 cups Parmesan(grated) {1 C shaved Parmesan}
1/4 lb pancetta, thinly sliced {1/4 lb uncured bacon}

Over medium to low heat:
Roughly chop pancetta, and render out in pan you'll be using for Orzo. After all fat is rendered and pancetta is crispy, remove and set aside.

Add diced onions to pan, sweat half way.

Chop mushrooms to desired size and add to pan. Add butter at intervals as mushrooms will absorb the fat. Lightly deglaze with a bit of white wine.

When mushrooms have cooked half way, add Orzo and butter (if necessary). Stir until all parts are fully coated for roughly a minute. Add rest of the white wine and stir. Partially reduce (do NOT burn orzo) and add water in s mall batches until Orzo is al dente. Kill the heat and add parm, pancetta, stir.

Add salt and pepper to taste, and finely chopped parsley {I added dill} right before serving. Note: parm is salty.

13 April 2012

Rustic Dutch Oven Bread: No-Knead But You'll Need It

After the first bread making party (two people eating a warm loaf of homemade bread slathered with honey butter while standing in the middle of the kitchen) we fell in love! In love with fresh, warm bread. This version is even easier than the basic bread recipe, as if that's possible. This no-knead bread is cooked in a Dutch oven to replicate the steam in commercial ovens - it produces a crusty outside and soft, dense, chewy inside.
Time and yeast pretty much do all the work for you. Look at all those glorious bubbles! It only took 18 hours. It's a very wet dough but not terribly sticky. This is our second batch of dough - dryer than the original recipe featured in the New York Times - because we used 3/8 of a cup less water. The bread itself was still moist.
Pour it out onto a well-floured surface, fold a few times, cover and let rest. Voila! So easy.
A little course-ground cornmeal to keep the dough from sticking to the towel and ultimately the Dutch oven. And then all you have to do it delicately drop the dough into the pot...POOF!!
Flour and cornmeal everywhere. No biggie.
Blurry action shot. We're really excited about digging into this rustic goodness. That kind of excited where you're drizzling a slice with honey while talking about adding cheese to the next slice.
Virgin slice. With Meadowfoam honey from Colorado. With melted Cotswald cheese (it melts into all the nooks and crannies!)


Recipe Time: Rustic Dutch Oven Bread: No-Knead but you'll Need It
adapted from the New York Times who adapted it from Jim Lahey, Sullivan Street Bakery
1 loaf
About 1½ hours plus 14 to 20 hours’ rising

3 C all-purpose or bread flour, more for dusting
1/4 tsp instant yeast
2 tsp Kosher salt
Cornmeal or wheat bran as needed.
1 1/2  C water
  1. In a large bowl combine flour, yeast and salt. Add 1 1/2 cups water, and stir until blended; dough will be shaggy and sticky. Cover bowl with plastic wrap. Let dough rest at least 12 hours, preferably about 18, at warm room temperature, about 70 degrees. {this is the how much water we used but their recipe called for 1 5/8 C}
  2. Dough is ready when its surface is dotted with bubbles. Lightly flour a work surface and place dough on it; sprinkle it with a little more flour and fold it over on itself once or twice. Cover loosely with plastic wrap and let rest about 15 minutes. {we covered it with a towel}
  3. Using just enough flour to keep dough from sticking to work surface or to your fingers, gently and quickly shape dough into a ball. Generously coat a cotton towel (not terry cloth) with flour, wheat bran or cornmeal; put dough seam side down on towel and dust with more flour, bran or cornmeal. Cover with another cotton towel and let rise for about 2 hours. When it is ready, dough will be more than double in size and will not readily spring back when poked with a finger. {we used cornmeal}
  4. At least a half-hour before dough is ready, heat oven to 450 degrees. Put a 6- to 8-quart heavy covered pot (cast iron, enamel, Pyrex or ceramic) in oven as it heats. When dough is ready, carefully remove pot from oven. Slide your hand under towel and turn dough over into pot, seam side up; it may look like a mess, but that is O.K. Shake pan once or twice if dough is unevenly distributed; it will straighten out as it bakes. Cover with lid and bake 30 minutes, then remove lid and bake another 15 to 30 minutes, until loaf is beautifully browned. Cool on a rack. {we used a 6 quart enamel Dutch oven and cooled it on a plate}


01 April 2012

Basic (Awesome) Bread

We made bread. It was great. You should make bread. It will be fantastic. We did not take a lot of step-by-step photos for this one because the recipe and technique are well documented by Alton Brown via recipe and multiple videos.

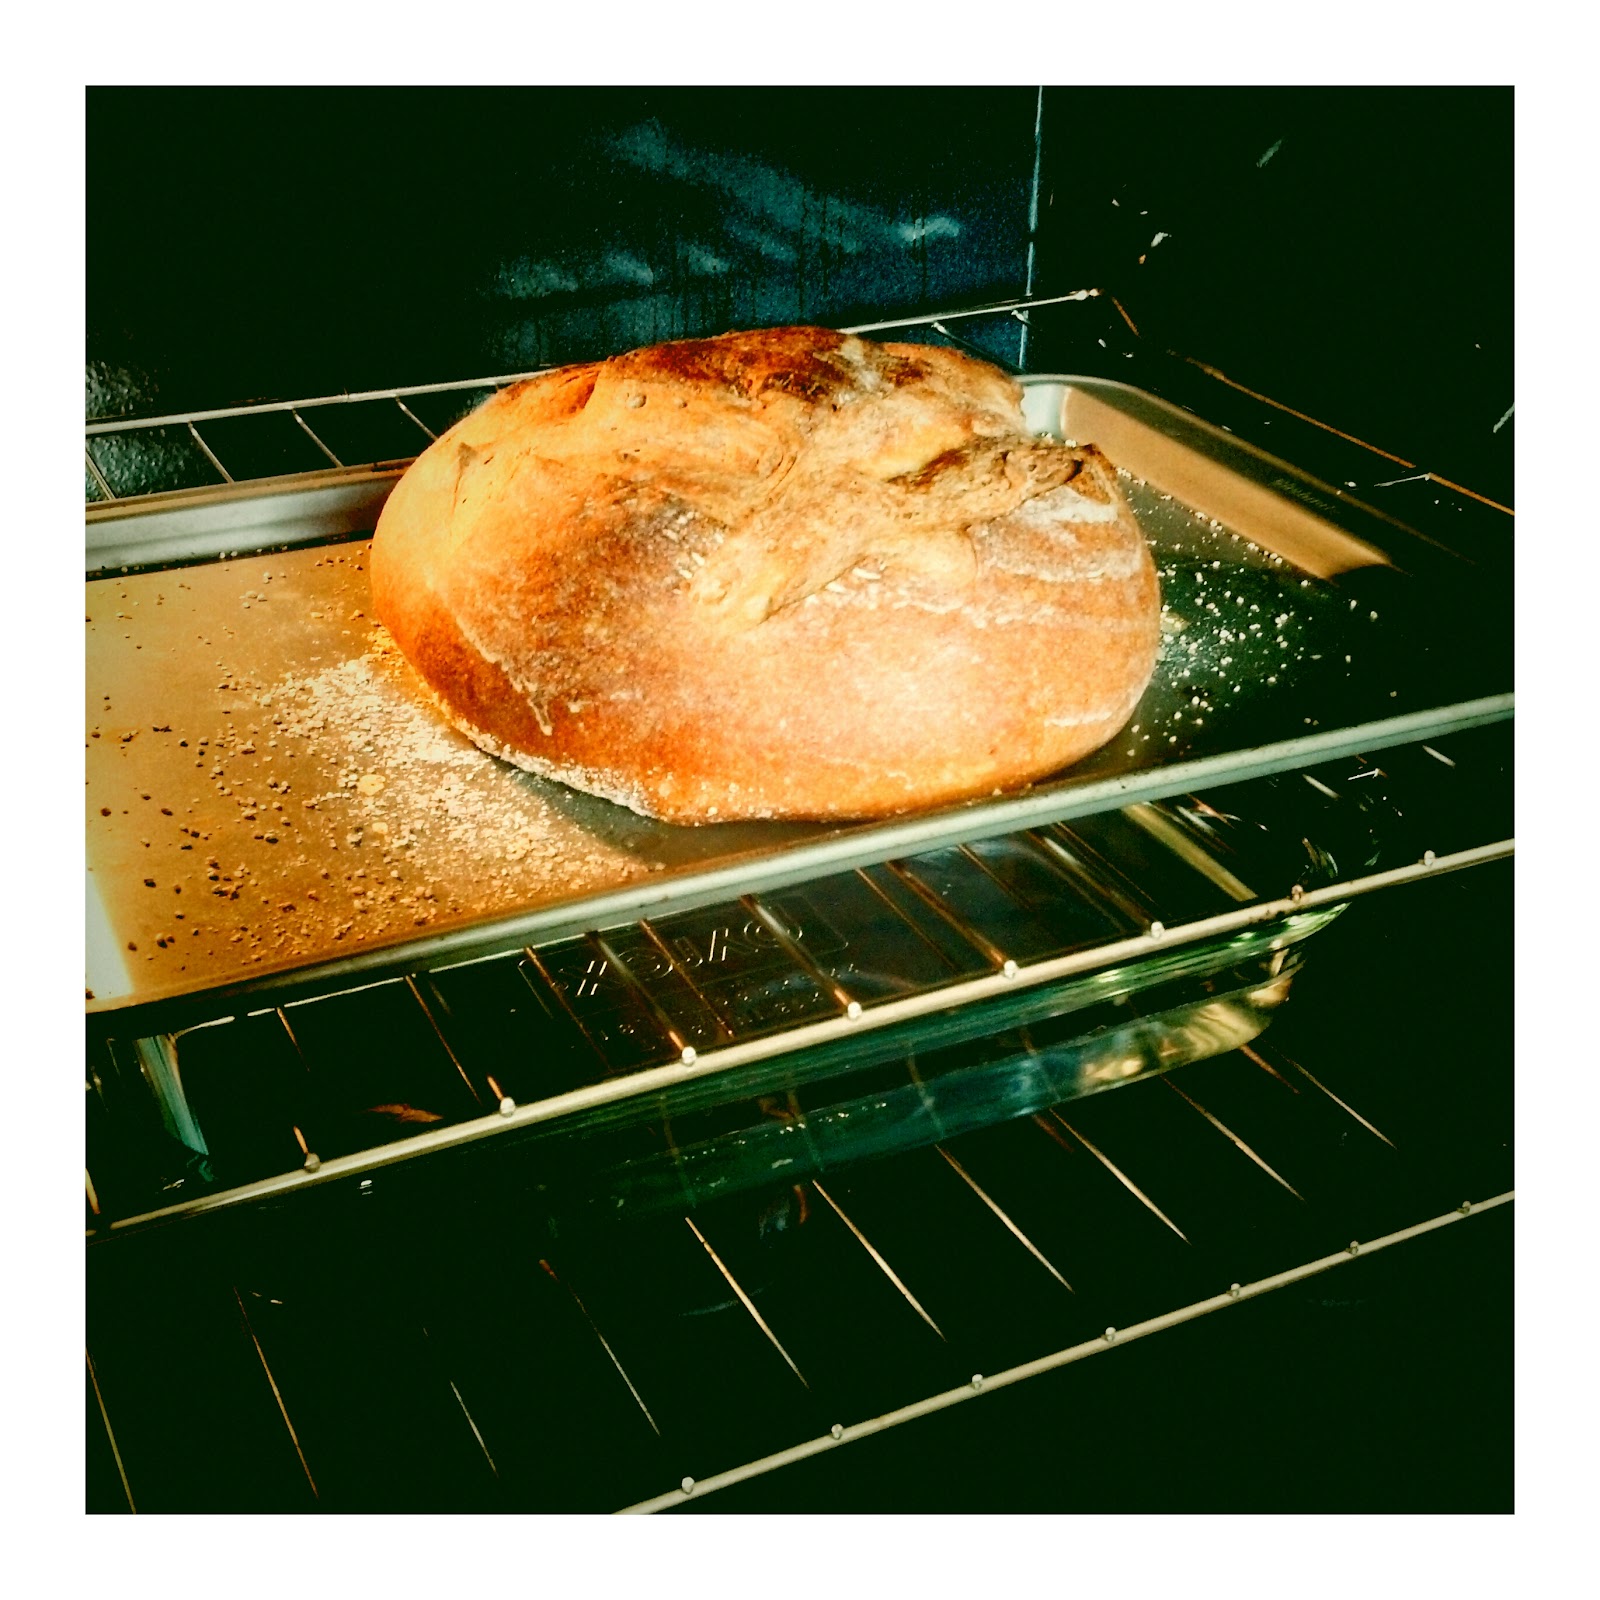
Plus, I think with bread you really have to feel it out and become one with the dough. I swear, digging your knuckles in to distribute and add fluffy air is such a dream. And look at that round lump of love up there. Yeah - good stuff, bread.


The tray of water underneath the upside-down cookie sheet really helped keep the bread moist and chewy and the crust was crisp but not too hard to slice through or chew. During the proofing step in the oven the recipe suggests the tray of hot water and we also turned the oven light on (the same technique we use for making our own yogurt).

Improvised cooling rack. The longest 30 minutes you'll ever wait. Did I mention you start the yeast 8 hours to overnight before the bread making? Sad lesson learned when we didn't get to eat bread yesterday. I suggest you use the cooling time to make delicious honey butter or melt some chocolate. Maybe slice ham and grind some mustard seeds in vinegar.

Recipe Time: Basic (Awesome) Bread
adapted from Alton Brown's Very Basic Bread
1 loaf

1 lb bread flour, plus extra for shaping
1 tsp instant rapid rise yeast
2 TBS honey
10 oz bottled or filtered water
2 tsp kosher salt
2 quarts hot water
Olive oil, for greasing the rising container
2 TBS cornmeal
1/3 C water
1 TBS cornstarch


Consider having a scale, a cooling rack, a large baking dish for water and a cookie sheet for baking. See Alton's videos for detailed instructions. Watching the techniques makes a lot more sense than just reading it. The directions we followed are below although we did not use a pizza peel - we used an upside-down cookie sheet for cooking and shaped it on a flour dusted counter.

------------------------------------
Alton's Directions

Combine 5 ounces of the flour, 1/4 teaspoon of the yeast, all of the honey, and all of the bottled water in a straight-sided container; cover loosely and refrigerate for 8 to 12 hours.

Place the remaining 11 ounces of flour, remaining yeast, and all the salt into the bowl of a stand mixer, and add the pre-ferment from the refrigerator. Using the dough hook attachment, knead the mixture on low for 2 to 3 minutes just until it comes together. Cover the dough in the bowl with a kitchen towel and allow to rest for 20 minutes. After 20 minutes, knead the dough on medium speed for 5 to 10 minutes or until you are able to gently pull the dough into a thin sheet that light will pass through. The dough will be sticky, but not so sticky that you can't handle it.

While the dough is kneading, pour half of the hot water into a shallow pan and place on the bottom rack of your oven.

Grease the inside of a large straight-sided container with the vegetable oil. Place the dough ball into the container and set on the rack above the pan of water. Allow to rise until doubled in size, approximately 1 to 2 hours.

Once the dough has doubled in size, turn it onto a counter top, lightly dust your hands with flour, and press the dough out with your knuckles; then fold 1 side in towards the middle of the mass and then the other, as if you were making a tri-fold wallet. Repeat the folding a second time. Cover the dough with a kitchen towel and allow to rest for another 10 minutes.

Flatten dough again with your knuckles and then fold the dough in onto itself, like you are shaping something that looks like a jellyfish. Turn the dough over and squeeze the bottom together so that the top surface of the dough is smooth. Place the dough back onto the counter and begin to roll gently between your hands. Do not grab the dough but allow it to move gently back and forth between your hands, moving in a circular motion. Move the dough ball to a pizza peel or the bottom of a sheet pan that has been sprinkled with the cornmeal. Cover with the kitchen towel and allow to bench proof for 1 hour, or until you poke the dough and it quickly fills back in where you poked it.

Place an unglazed terra cotta dish upside down into the oven and heat the oven to 400 degrees F.

Combine the 1/3 cup of water and the cornstarch in a small bowl. Uncover the dough and brush the surface with this mixture. Gently slash the top surface of the dough ball in several places, approximately 1/3 to 1/2-inch deep. Add more of the hot water to the shallow pan if it has evaporated. Slide the bread onto the terra cotta dish in the oven and bake for 50 to 60 minutes. Once the bread has reached an internal temperature of 205 to 210 degrees F, remove to a cooling rack and allow to sit for 30 minutes before slicing.


04 July 2011

Cheery Cherry Spice Muffins

Misspelled Cherry Muffins, Cheery Cherry, Carrot Spice, Coconut Hummingbird Variation Muffins, Butterless Banana, Use What Is In the Fridge - so many names for one little muffin. Born of desire and necessity or the use what you have mentality of baking. You won't see the Failed Blueberry Banana muffins because they sucked (I guess with a name like that they were doomed from the start).

Look at all those delicious cherry and coconut and carrot bits! Oh, and while pretty, I can't recommend this paper liner for this recipe because it tends to stick. Maybe try a parchment paper next time.

Recipe Time: Cheery Cherry Spice Muffins
adapted from my brain
12 regular sized muffins

2 eggs
1/3 C sugar
1 ripe banana
2/3 C chopped cherries
1/3 C diced carrots
1/3 C sweetened coconut
1/4 C fat free Greek Yogurt
1/2 C fat free milk
1 C AP flour
2/3 C quick rolled oats
1 TBS cinnamon
1 tsp Chinese five spice
1 tsp diced lemon peel (dried)
1/2 tsp baking soda
1/2 tsp baking powder
1/2 tsp salt
  1. Preheat oven to 350 degrees F
  2. Line or grease regular size muffin pan
  3. Mix wet ingredients
  4. Sift and add dry ingredients
  5. Mix just until all incorporated
  6. Bake for 20-22 minutes

15 June 2011

Pumpkin Pie in a Cupcake (no fancy title, it rocks!)

Every time you bake a pumpkin pie in a cupcake a kitten gets its wings. Seriously. And the angelic meows will serenade you as you enjoy your first delicious bite and your 30th secret bite, because no one can turn down a miniature pumpkin pie in a delectable vanilla cupcake with cream cheese frosting dusted with unicorn dust - I mean cinnamon.

Start by making the miniature pumpkin pies which are just like full-size pies except you need refrigerated, rolled pie dough and a round cutting device. A cookie cutter, a biscuit cutter or a glass cup with a thin edge will all work nicely. Expertly manipulate the tiny pie crust round into a tiny muffin tin. There will be folds, it won't look the best but that's okay! It almost doesn't matter what these look like - people will love you!

Mix the pie filling according to the directions on the side of the can. Why mess with grandma's recipe is what I always say. This canned gloop above is much tastier than straight up canned pumpkin which I always forget when I dip a big spoon into a can of plain pumpkin. Blech!

The two-pack of pie crusts only made 12 tiny pies (and some of those were mashed together scraps) so I poured the rest of the pumpkin filling in  large, glass casserole dish and called it pumpkin custard.

The pies don't take as long as a full-size one so keep your eye on them. The crust needs to be firm so it doesn't get soggy in the cupcake. The same goes for the filling - it should be fully cooked and set.

Butter for the cupcakes, butter for the frosting. You'd better stock up. We made these cupcakes vanilla but any cupcake recipe should work. I personally think a carrot cake with pumpkin pie inside would be great and meet your daily need for vegetables. You can mix this while the pies are cooking or after they come out of the oven since the pies should cool down and you don't want them to burn while you're busy eating cake batter.

Fill the regular-size cupcake tins about 1/3 full or just enough so that you have a layer of batter under the tiny pie and enough room to cover said pie with more batter. Gently! Gently place the pies in the batter, making sure not to squish the batter out from under the pie too much. Then cover the pie with more cupcake batter until it just covers the top of the pie.

These cupcakes were a little too big! Definitely some muffin top going on here. Bake according to your cupcake recipe or until the top is slightly golden. I find that as soon as I can smell the cupcakes (or brownies) baking they're done. No muffin cups needed, just a good non-stick pan and some cooking spray for good measure. Tilt the cupcakes on their side as soon as possible to stop the cooking process and start the cool down.

More glorious butter shots...here's half the ingredients for cream cheese frosting. After the frosting is all mixed scoop it into a zip-top plastic bag. Taste test it. Double check for flavor quality. Close up the top of the bag and snip a tiny hole in the corner to create a angel kitten frosting machine.

Taste testing in action. Nom nom nom.


Adapted from Bake It in a Cake (they seem to have taken down the recipe, and I didn't write it down!) A good vanilla cupcake recipe can be found all over the interwebs. Here's one from Magnolia - Magnolia's Vanilla Cupcake. The same goes for cream cheese frosting - this one is The Best Cream Cheese Frosting from Slash foods and it looks just like what we made.

29 November 2010

Thanksgiving Turkey Cake (Something To Be Thankful For)


Thanksgiving Turkey Cake. A Slice of Heaven. All Your Thanksgiving Food Dreams on a Pedestal. This is the meal you've heard whispered about by people with a twinkle in their eye and a heart of Yukon gold potatoes. Plus it makes you happy. We couldn't stop laughing as we carefully slid it from pan to pedestal and carried it to the table. It's that awesome!

It took about 3 to 3.5 hours total to make all the layers of the cake, but you can make the mashed potatoes, sausage stuffing, cranberry orange sauce and sweet potatoes ahead of time and rewarm them when you need them. There was even time for last minute grocery shopping on Thursday morning.

The following instructions are adapted pretty faithfully from the Chow site, but I'll add a few personal notes. For example, if you use the Sausage Stuffing recipe, you will have a heck of a lot of stuffing. You'd better like stuffing. It's a good thing stuffing freezes. That's all I'm saying. Or I guess you could cut the recipe down by about an eighth.


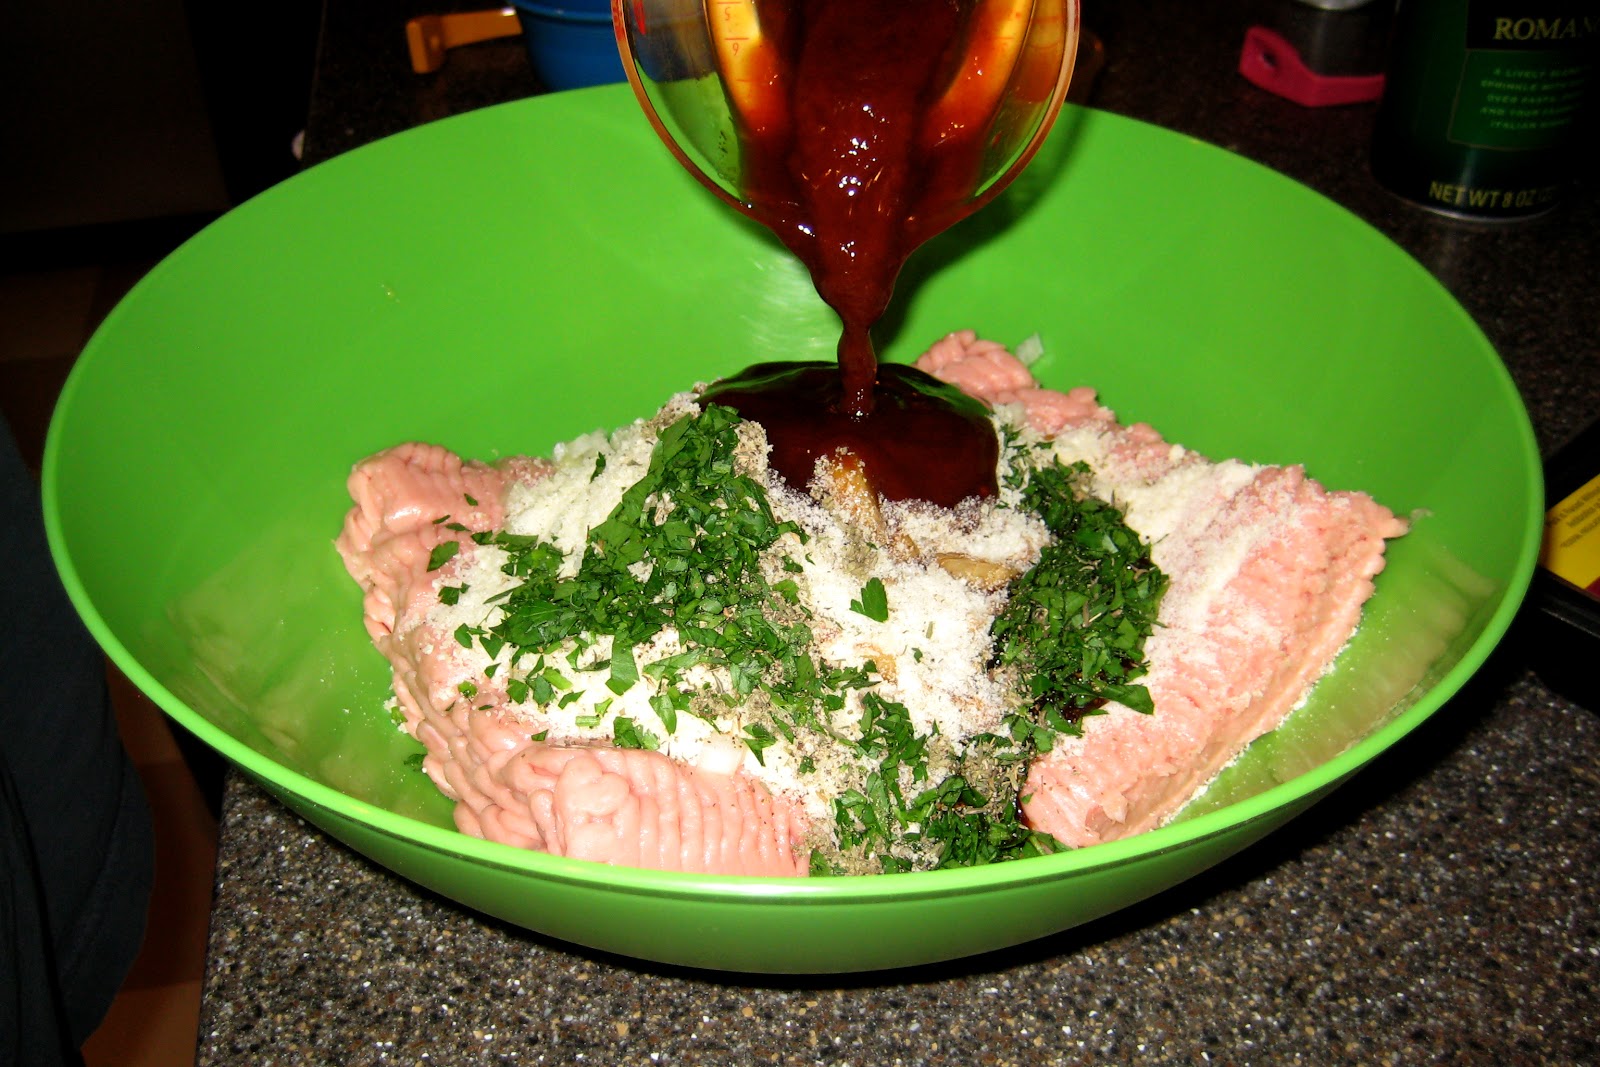
Have you noticed how raw meat shots are really unattractive? The turkey loaves, or layers if you prefer, taste quite good (probably all the umami in ketchup, Worcestershire sauce and Parmesan cheese).


There's no getting around it, you'll need to use your hands to hold the stuffing in place as you mash it into the potatoes. Mashed potatoes are the glue of the culinary world.


The Mashed Potatoes recipe will leave you with about 2 cups left over. Good for late-night snacking or if some slips on the floor when you ice the cake.


Watch those marshmallows like a hawk. A hawk that likes perfectly toasted marshmallows.


The real reason the Cranberry Relish is on the side is because it wasn't done in time to go inside the cake. But now I like that is adds color to the table and the plate. Check out those nifty paper towel napkins!

Thanksgiving Turkey Cake with a fancy feather-shaped cranberry plating and a side of carrot almond soup. Yum.

Recipe Time: Thanksgiving Turkey Cake
adapted from Chow site
serves 8 to 10

Ingredients, Turkey Layers:
Unsalted butter, for coating the pans
2 pounds ground turkey breast
1 cup quick-cooking oats
1/2 cup Parmesan cheese
1/3 cup ketchup
1/3 cup finely chopped yellow onion
1/4 cup finely chopped fresh Italian parsley
1/4 cup Worcestershire sauce
2 tablespoons soy sauce
1 teaspoons minced dried thyme
1/2 teaspoon freshly ground black pepper
2 medium garlic cloves, minced

Cake Components:
About 5 cups or 1 recipe Greek Yogurt Mashed Potatoes, warm
1/2 cup Cranberry Orange Relish, chilled, excess liquid drained
2 1/2 cups Sausage Stuffing, warm
1 cup Sweet Potatoes, warm
1 1/2 cups mini marshmallows  

Instructions, Turkey Layers:
  1. Heat the oven to 350°F and arrange a rack in the middle.
  2. Coat 2 (8-inch) cake pans with butter; set aside.
  3. Place all remaining ingredients in a large bowl and mix, using clean hands, until combined (don’t squeeze or overwork).
  4. Divide the mixture evenly between the pans, spreading it to the edges and smoothing out the top.
  5. Bake until cooked through and the cakes begin to pull away from the edges of the pans, about 25 minutes.
  6. Remove from the oven (but leave the oven on), and let cool for about 10 minutes.
  7. Using a paper towel, blot away any excess fat from the cake layers’ surface; set aside.

Assembling the Cake:
  1. Arrange a rack in the lower third of the oven.
  2. Unmold one of the turkey layers and place it bottom-side up on an overturned 8-inch cake pan or in an ovenproof serving dish.
  3. Use a spatula to evenly spread 1 1/4 cups of the mashed potatoes over the top of the cake, leaving a 1/2 -inch border (keep the remaining potatoes warm).
  4. Using the back of a clean spoon, spread the cranberry sauce evenly over the mashed potatoes. (optional)
  5. Using your hands, gently pack the stuffing in an even layer over the cranberry sauce, using one hand to keep any stuffing from falling off the side. Press gently on the stuffing to make sure it adheres to the mashed potatoes and cranberry sauce.
  6. Evenly spread another 1 1/4 cups of the mashed potatoes over the stuffing (keep the remaining potatoes warm).
  7. Unmold the second turkey layer and place it bottom-side up on top of the mashed potatoes.
  8. Transfer the cake pan or serving dish with the partially assembled cake to a baking sheet and bake until heated through, about 30 to 40 minutes (an instant-read thermometer should register 165°F).
  9. Remove from the oven and set aside. Heat the oven to broil.
  10. Evenly coat the outside (but not top) of the entire cake with the remaining mashed potatoes (you may have a little left over).
  11. Spread all of the sweet potatoes on top of the cake. Arrange the marshmallows across the top and gently press them into the sweet potatoes.
  12. Return the baking sheet with the assembled cake to the oven and broil until the marshmallows are golden, about 1 to 2 minutes (watch closely so the marshmallows don’t burn). Using two flat spatulas, carefully transfer the cake to a serving dish. Serve immediately.
    Related Posts with Thumbnails