Pour it out onto a well-floured surface, fold a few times, cover and let rest. Voila! So easy.
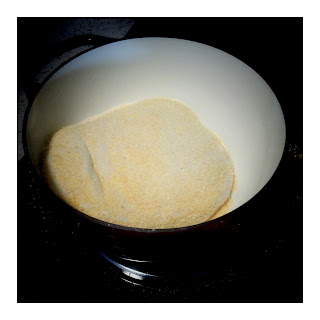
A little course-ground cornmeal to keep the dough from sticking to the towel and ultimately the Dutch oven. And then all you have to do it delicately drop the dough into the pot...POOF!!
Flour and cornmeal everywhere. No biggie.
Blurry action shot. We're really excited about digging into this rustic goodness. That kind of excited where you're drizzling a slice with honey while talking about adding cheese to the next slice.
Virgin slice. With Meadowfoam honey from Colorado. With melted Cotswald cheese (it melts into all the nooks and crannies!)
Recipe Time: Rustic Dutch Oven Bread: No-Knead but you'll Need It
adapted from the New York Times who adapted it from Jim Lahey, Sullivan Street Bakery
1 loaf
About 1½ hours plus 14 to 20 hours’ rising
3 C all-purpose or bread flour, more for dusting
1/4 tsp instant yeast
2 tsp Kosher salt
Cornmeal or wheat bran as needed.
1 1/2 C water
Flour and cornmeal everywhere. No biggie.
Virgin slice. With Meadowfoam honey from Colorado. With melted Cotswald cheese (it melts into all the nooks and crannies!)
Recipe Time: Rustic Dutch Oven Bread: No-Knead but you'll Need It
adapted from the New York Times who adapted it from Jim Lahey, Sullivan Street Bakery
1 loaf
About 1½ hours plus 14 to 20 hours’ rising
3 C all-purpose or bread flour, more for dusting
1/4 tsp instant yeast
2 tsp Kosher salt
Cornmeal or wheat bran as needed.
1 1/2 C water
- In a large bowl combine flour, yeast and salt. Add 1 1/2 cups water, and stir until blended; dough will be shaggy and sticky. Cover bowl with plastic wrap. Let dough rest at least 12 hours, preferably about 18, at warm room temperature, about 70 degrees. {this is the how much water we used but their recipe called for 1 5/8 C}
- Dough is ready when its surface is dotted with bubbles. Lightly flour a work surface and place dough on it; sprinkle it with a little more flour and fold it over on itself once or twice. Cover loosely with plastic wrap and let rest about 15 minutes. {we covered it with a towel}
- Using just enough flour to keep dough from sticking to work surface or to your fingers, gently and quickly shape dough into a ball. Generously coat a cotton towel (not terry cloth) with flour, wheat bran or cornmeal; put dough seam side down on towel and dust with more flour, bran or cornmeal. Cover with another cotton towel and let rise for about 2 hours. When it is ready, dough will be more than double in size and will not readily spring back when poked with a finger. {we used cornmeal}
- At least a half-hour before dough is ready, heat oven to 450 degrees. Put a 6- to 8-quart heavy covered pot (cast iron, enamel, Pyrex or ceramic) in oven as it heats. When dough is ready, carefully remove pot from oven. Slide your hand under towel and turn dough over into pot, seam side up; it may look like a mess, but that is O.K. Shake pan once or twice if dough is unevenly distributed; it will straighten out as it bakes. Cover with lid and bake 30 minutes, then remove lid and bake another 15 to 30 minutes, until loaf is beautifully browned. Cool on a rack. {we used a 6 quart enamel Dutch oven and cooled it on a plate}


