Showing posts with label side dish. Show all posts

02 January 2013

Creamy Parmesan Orzo

It occurs to me that people have an odd idea of what a "staple" is. No, I don't have butter on hand, but I do have four different bottles of balsamic vinegar. Other items I don't have: bread (I hold the bacon in my hand), mayonnaise (it's gross and should never be used as a hair conditioner no matter what the women's magazines tell you), cheese (because cheese addicts shouldn't keep it in the house). My pantry/fridge is not all bacon and balsamic mind you, I have a copious amount of Greek yogurt, marzipan shaped like fruit, 10 microwave vegetable lasagnas....

But when I'm not eating directly from the fridge or microwave this creamy, Parmesan orzo is a nice New Years treat. The recipe is great for practicing various beginner cooking techniques and only requires a little patience and the ability to focus. FOCUS, do not check your phone or computer. Or make tea.

Important cooking skills like sharpening your knife, chopping veggies roughly the same size, rendering fat, sweating vegetables, deglazing, focusing (side note: I only have one knife, one pot and one cutting board and hate cleaning dishes so one-pot dishes are my bff).


The key to cooking risotto-like orzo, sweating the onions and rendering the bacon are keeping the heat low. I have the tendency to go medium/high for everything and felt pretty zen after keeping it low and chill for so long.

Globs of butter, crispy bacon, creamy cheese, warm pasta, umami-rich wine and mushrooms and a hint of dill.
Recipe Time: Creamy Parmesan Orzo
recipe as given, my substitutions in {}
2.5 quarts
1 hour-ish

1lb Orzo
3/4 lb shiitake mushrooms {baby bella mushrooms}
1 large sweet onion, medium dice {3 small yellow onions}
Stick and a half butter {1 stick unsalted butter}
1 cup white wine
1½-2 cups water {2½ C hot water}
2 cups Parmesan(grated) {1 C shaved Parmesan}
1/4 lb pancetta, thinly sliced {1/4 lb uncured bacon}

Over medium to low heat:
Roughly chop pancetta, and render out in pan you'll be using for Orzo. After all fat is rendered and pancetta is crispy, remove and set aside.

Add diced onions to pan, sweat half way.

Chop mushrooms to desired size and add to pan. Add butter at intervals as mushrooms will absorb the fat. Lightly deglaze with a bit of white wine.

When mushrooms have cooked half way, add Orzo and butter (if necessary). Stir until all parts are fully coated for roughly a minute. Add rest of the white wine and stir. Partially reduce (do NOT burn orzo) and add water in s mall batches until Orzo is al dente. Kill the heat and add parm, pancetta, stir.

Add salt and pepper to taste, and finely chopped parsley {I added dill} right before serving. Note: parm is salty.

13 April 2012

Rustic Dutch Oven Bread: No-Knead But You'll Need It

After the first bread making party (two people eating a warm loaf of homemade bread slathered with honey butter while standing in the middle of the kitchen) we fell in love! In love with fresh, warm bread. This version is even easier than the basic bread recipe, as if that's possible. This no-knead bread is cooked in a Dutch oven to replicate the steam in commercial ovens - it produces a crusty outside and soft, dense, chewy inside.
Time and yeast pretty much do all the work for you. Look at all those glorious bubbles! It only took 18 hours. It's a very wet dough but not terribly sticky. This is our second batch of dough - dryer than the original recipe featured in the New York Times - because we used 3/8 of a cup less water. The bread itself was still moist.
Pour it out onto a well-floured surface, fold a few times, cover and let rest. Voila! So easy.
A little course-ground cornmeal to keep the dough from sticking to the towel and ultimately the Dutch oven. And then all you have to do it delicately drop the dough into the pot...POOF!!
Flour and cornmeal everywhere. No biggie.
Blurry action shot. We're really excited about digging into this rustic goodness. That kind of excited where you're drizzling a slice with honey while talking about adding cheese to the next slice.
Virgin slice. With Meadowfoam honey from Colorado. With melted Cotswald cheese (it melts into all the nooks and crannies!)


Recipe Time: Rustic Dutch Oven Bread: No-Knead but you'll Need It
adapted from the New York Times who adapted it from Jim Lahey, Sullivan Street Bakery
1 loaf
About 1½ hours plus 14 to 20 hours’ rising

3 C all-purpose or bread flour, more for dusting
1/4 tsp instant yeast
2 tsp Kosher salt
Cornmeal or wheat bran as needed.
1 1/2  C water
  1. In a large bowl combine flour, yeast and salt. Add 1 1/2 cups water, and stir until blended; dough will be shaggy and sticky. Cover bowl with plastic wrap. Let dough rest at least 12 hours, preferably about 18, at warm room temperature, about 70 degrees. {this is the how much water we used but their recipe called for 1 5/8 C}
  2. Dough is ready when its surface is dotted with bubbles. Lightly flour a work surface and place dough on it; sprinkle it with a little more flour and fold it over on itself once or twice. Cover loosely with plastic wrap and let rest about 15 minutes. {we covered it with a towel}
  3. Using just enough flour to keep dough from sticking to work surface or to your fingers, gently and quickly shape dough into a ball. Generously coat a cotton towel (not terry cloth) with flour, wheat bran or cornmeal; put dough seam side down on towel and dust with more flour, bran or cornmeal. Cover with another cotton towel and let rise for about 2 hours. When it is ready, dough will be more than double in size and will not readily spring back when poked with a finger. {we used cornmeal}
  4. At least a half-hour before dough is ready, heat oven to 450 degrees. Put a 6- to 8-quart heavy covered pot (cast iron, enamel, Pyrex or ceramic) in oven as it heats. When dough is ready, carefully remove pot from oven. Slide your hand under towel and turn dough over into pot, seam side up; it may look like a mess, but that is O.K. Shake pan once or twice if dough is unevenly distributed; it will straighten out as it bakes. Cover with lid and bake 30 minutes, then remove lid and bake another 15 to 30 minutes, until loaf is beautifully browned. Cool on a rack. {we used a 6 quart enamel Dutch oven and cooled it on a plate}


01 April 2012

Basic (Awesome) Bread

We made bread. It was great. You should make bread. It will be fantastic. We did not take a lot of step-by-step photos for this one because the recipe and technique are well documented by Alton Brown via recipe and multiple videos.

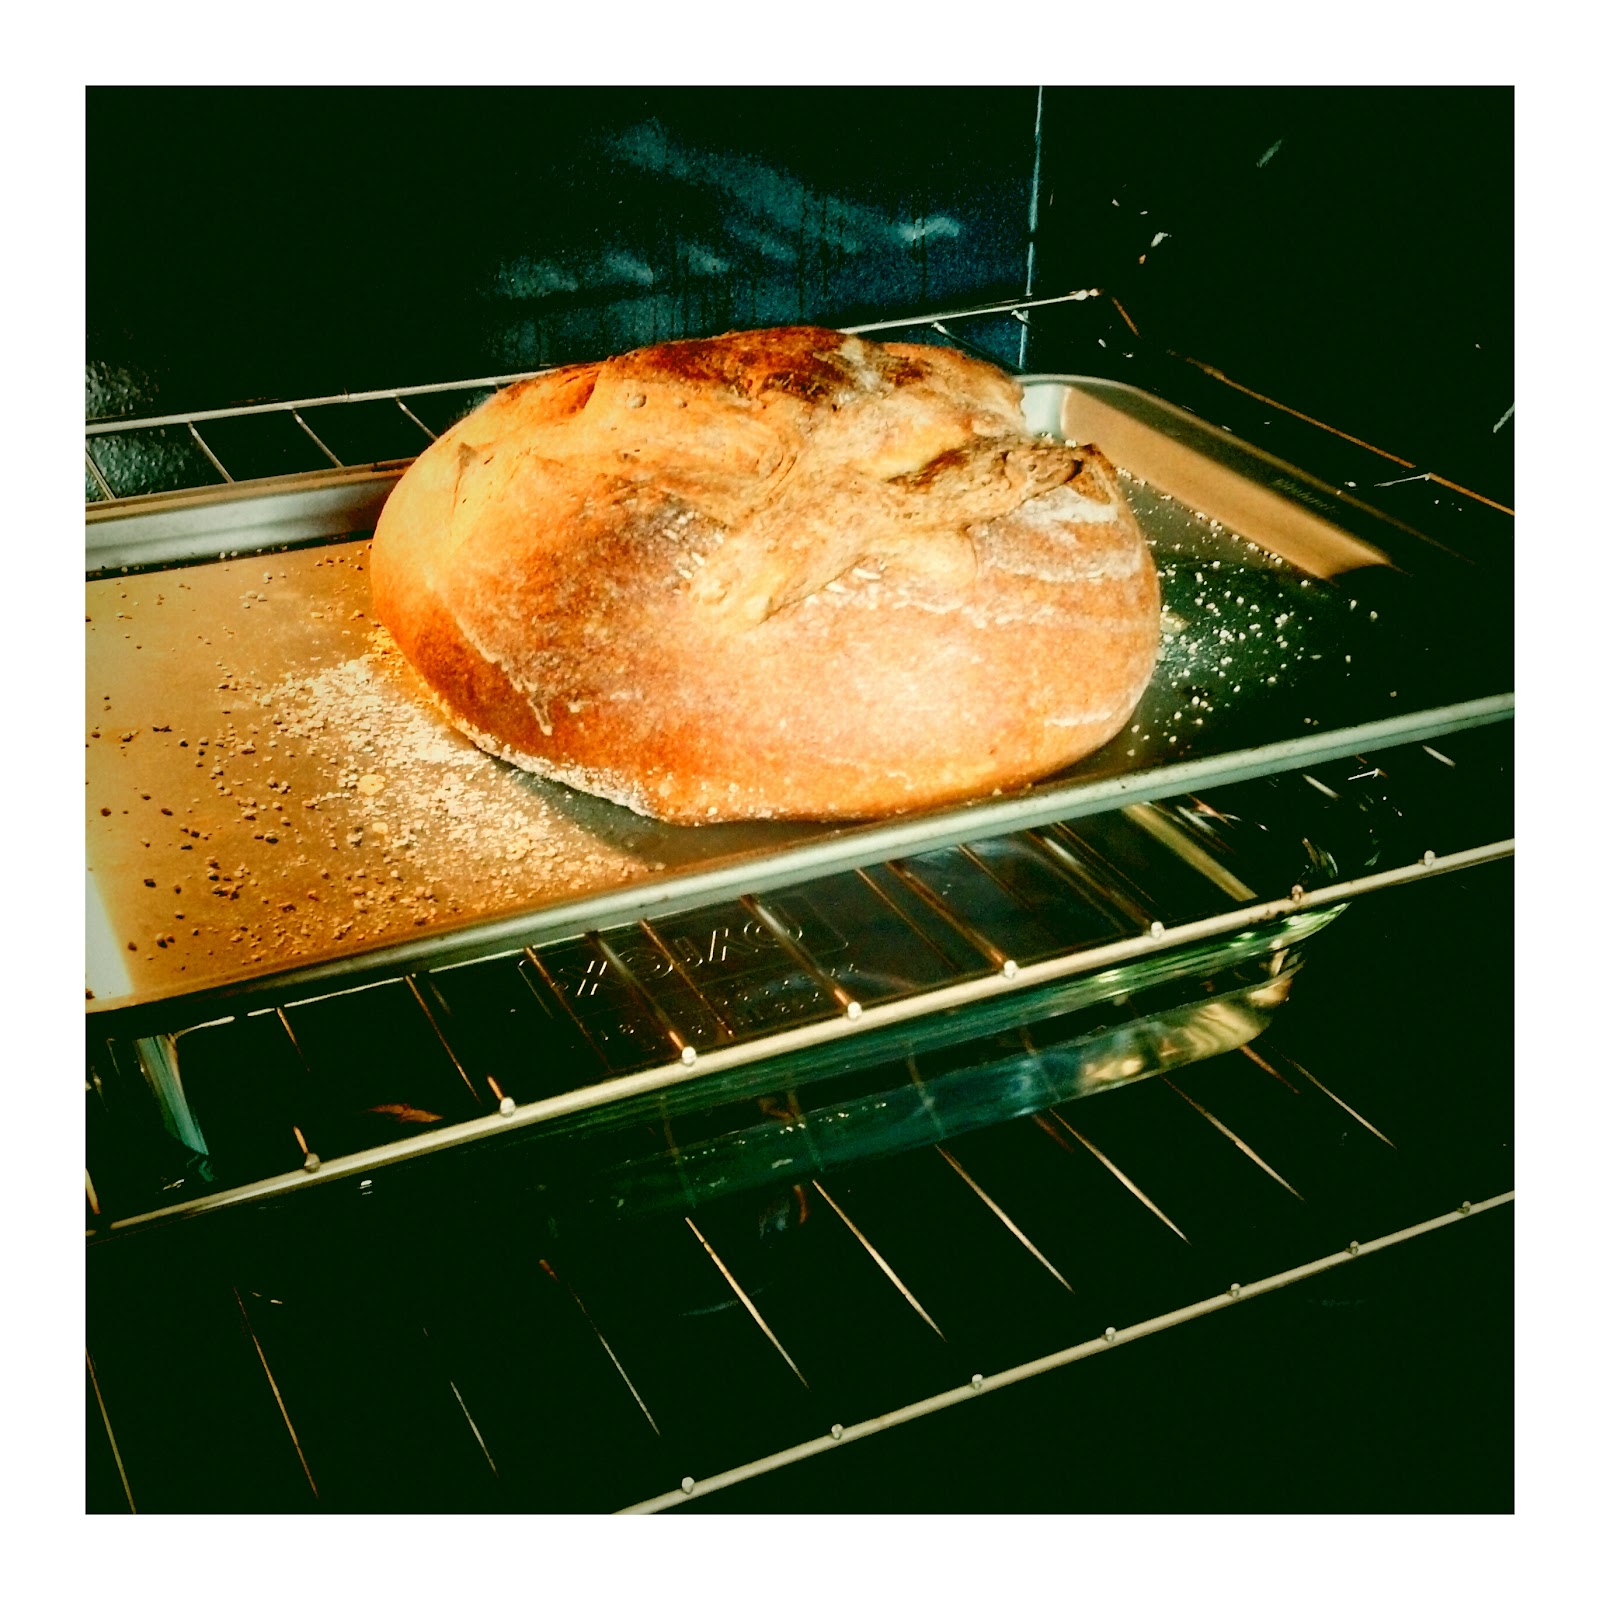
Plus, I think with bread you really have to feel it out and become one with the dough. I swear, digging your knuckles in to distribute and add fluffy air is such a dream. And look at that round lump of love up there. Yeah - good stuff, bread.


The tray of water underneath the upside-down cookie sheet really helped keep the bread moist and chewy and the crust was crisp but not too hard to slice through or chew. During the proofing step in the oven the recipe suggests the tray of hot water and we also turned the oven light on (the same technique we use for making our own yogurt).

Improvised cooling rack. The longest 30 minutes you'll ever wait. Did I mention you start the yeast 8 hours to overnight before the bread making? Sad lesson learned when we didn't get to eat bread yesterday. I suggest you use the cooling time to make delicious honey butter or melt some chocolate. Maybe slice ham and grind some mustard seeds in vinegar.

Recipe Time: Basic (Awesome) Bread
adapted from Alton Brown's Very Basic Bread
1 loaf

1 lb bread flour, plus extra for shaping
1 tsp instant rapid rise yeast
2 TBS honey
10 oz bottled or filtered water
2 tsp kosher salt
2 quarts hot water
Olive oil, for greasing the rising container
2 TBS cornmeal
1/3 C water
1 TBS cornstarch


Consider having a scale, a cooling rack, a large baking dish for water and a cookie sheet for baking. See Alton's videos for detailed instructions. Watching the techniques makes a lot more sense than just reading it. The directions we followed are below although we did not use a pizza peel - we used an upside-down cookie sheet for cooking and shaped it on a flour dusted counter.

------------------------------------
Alton's Directions

Combine 5 ounces of the flour, 1/4 teaspoon of the yeast, all of the honey, and all of the bottled water in a straight-sided container; cover loosely and refrigerate for 8 to 12 hours.

Place the remaining 11 ounces of flour, remaining yeast, and all the salt into the bowl of a stand mixer, and add the pre-ferment from the refrigerator. Using the dough hook attachment, knead the mixture on low for 2 to 3 minutes just until it comes together. Cover the dough in the bowl with a kitchen towel and allow to rest for 20 minutes. After 20 minutes, knead the dough on medium speed for 5 to 10 minutes or until you are able to gently pull the dough into a thin sheet that light will pass through. The dough will be sticky, but not so sticky that you can't handle it.

While the dough is kneading, pour half of the hot water into a shallow pan and place on the bottom rack of your oven.

Grease the inside of a large straight-sided container with the vegetable oil. Place the dough ball into the container and set on the rack above the pan of water. Allow to rise until doubled in size, approximately 1 to 2 hours.

Once the dough has doubled in size, turn it onto a counter top, lightly dust your hands with flour, and press the dough out with your knuckles; then fold 1 side in towards the middle of the mass and then the other, as if you were making a tri-fold wallet. Repeat the folding a second time. Cover the dough with a kitchen towel and allow to rest for another 10 minutes.

Flatten dough again with your knuckles and then fold the dough in onto itself, like you are shaping something that looks like a jellyfish. Turn the dough over and squeeze the bottom together so that the top surface of the dough is smooth. Place the dough back onto the counter and begin to roll gently between your hands. Do not grab the dough but allow it to move gently back and forth between your hands, moving in a circular motion. Move the dough ball to a pizza peel or the bottom of a sheet pan that has been sprinkled with the cornmeal. Cover with the kitchen towel and allow to bench proof for 1 hour, or until you poke the dough and it quickly fills back in where you poked it.

Place an unglazed terra cotta dish upside down into the oven and heat the oven to 400 degrees F.

Combine the 1/3 cup of water and the cornstarch in a small bowl. Uncover the dough and brush the surface with this mixture. Gently slash the top surface of the dough ball in several places, approximately 1/3 to 1/2-inch deep. Add more of the hot water to the shallow pan if it has evaporated. Slide the bread onto the terra cotta dish in the oven and bake for 50 to 60 minutes. Once the bread has reached an internal temperature of 205 to 210 degrees F, remove to a cooling rack and allow to sit for 30 minutes before slicing.


29 November 2010

Sweet Potatoes with Mini Marshmallows

Frozen vegetables are amazing. You can buy a 1 pound bag of pre-cubed, frozen sweet potatoes that have no added yuckiness and steam in the bag in the microwave. Do it. They tastes just as good.


You don't have to put your sweet potatoes on top of a Thanksgiving Turkey Cake but you won't be sorry if you do. I suppose they make a nice side dish too.
Recipe Time: Sweet Potatoes with Mini Marshmallows
adapted from Chow site
serves 8

1 pound sweet potatoes
1/4 cup skim milk
2 tablespoons unsalted butter (1/4 stick)
1 tablespoon packed light brown sugar
1 teaspoon kosher salt, plus more as needed
Pinch ground mace or nutmeg
Freshly ground black pepper
  1. Cook sweet potatoes according to directions on package.
  2. Place sweet potatoes in an oven-safe dish and puree with a masher or a strong fork.
  3. While still hot add the butter, then the milk, followed by spices - mix well.
  4. Top with mini marshmallows.
  5. Place under broiler (remember to use an oven safe dish) for 1 to 2 minutes and watch carefully so the marshmallows don't catch on fire.

Sausage Stuffing

MMMmmmm sausage. Focus! I disagree with the amount of broth in the original recipe, and maybe that's because I used dried bread instead of fresh, but it could also be a taste preference. I guess that's what happens when you shop for bread on Thursday morning and yet refuse to pay $3 or more a loaf - you buy dried bread cubes.
I like stuffing really moist, like a custard. I'd add at least 2 cups of broth and maybe more. You can always add liquid and rebake if it's not the right consistency for you.
Darn flashy cranberries, always stealing the show! This stuffing recipe made three times the amount seen in the above photo. I hope you love stuffing.

Receipe Time: Sausage Stuffing
adapted from Chow site
serves 10-12

2 pounds of dried bread cubes
1 pound sweet Italian sausage, casings removed
4 tablespoons unsalted butter (1/2 stick)
1 1/2 cups finely chopped celery (about 4 large stalks)
1 1/2 cups finely chopped yellow onion (about 1 large)
1 1/2 teaspoons paprika
Kosher salt
Freshly ground black pepper
medium garlic cloves, minced
1/4 cup finely chopped fresh Italian parsley
1 teaspoons dried thyme
3/4 cup (if stuffing a turkey) or 1 1/2 cups (if baking separately) low-sodium chicken broth
  1. Heat the oven to 350°F and arrange a rack in the middle.
  2. Heat a large frying pan over medium-high heat until hot, about 2 minutes.
  3. Add the sausage and break it into pea-size pieces. Cook, stirring occasionally, until it’s no longer pink, about 6 minutes. Using a slotted spoon, transfer the sausage to a medium bowl.
  4. Set the pan with the sausage drippings back over medium-high heat and add the butter.
  5. Once melted, add the celery, onions, and paprika. Season with salt and pepper and cook, stirring occasionally, until the onions are softened, about 6 minutes.
  6. Add the garlic and sauté until fragrant, about 30 seconds.
  7. Add the reserved sausage and the herbs and stir to combine.
  8. Add 3/4 cup of the broth and scrape the bottom of the pan with a wooden spoon to release any browned bits.
  9. Transfer the sausage mixture to a bowl with the bread cubes and stir to combine. Let sit for 10 minutes. Taste and season with additional salt and pepper as needed.
  10. If you’re using the stuffing in a turkey, let it cool to room temperature before proceeding (do not add the remaining 3/4 cup broth—the stuffing will moisten as it cooks inside the turkey).
  11. If you’re baking it separately, add just enough broth to moisten the mixture (you may not need the entire remaining 3/4 cup). Taste and season with more salt and pepper as needed.
  12. Transfer to a 4-quart baking dish, cover with a lid or foil, and bake 20 minutes. Uncover and bake until dry to the touch and golden brown on top, about 20 minutes more.

Greek Yogurt Mashed Potatoes

You probably know how to make mashed potatoes. But did you know they make a great glue (between your turkey cake layers) or an excellent icing (again - turkey cake!). What I learned while making these is that salting the water when you boil the potatoes makes a huge difference in flavor. I already knew Greek yogurt is a tasty replacement for sour cream and it lends a subtle creamy tang to these potatoes.

Look at that fantastic mashed potato icing!

Recipe Time: Greek Yogurt Mash Potatoes
adapted from Chow site
serves 8-10

3 pounds Yukon gold potatoes
Salt
4 tablespoons unsalted butter (1 stick)
1/2 cup skim milk (if the mash seem too dry add milk a little bit at a time)
1/2 cup fat-free Greek yogurt
Freshly ground black pepper
  1. Peel potatoes, cut into 1-1/2-inch chunks, you can place the chunks in a large bowl of water to prevent browning while you're chopping.
  2. When the potatoes are all cut, place in a large pot. Immediately add cold water to cover the potatoes by at least 2 inches and enough salt so that the water tastes like seawater.
  3. Bring to a boil over high heat. Once boiling, reduce heat to medium low and simmer until potatoes can easily be pierced with a fork and just begin to fall apart, about 15 minutes.
  4. Drain potatoes in a colander and let sit undisturbed for about 5 minutes. Meanwhile, in the pot used to cook the potatoes, warm the butter and the milk over medium heat until the mixture is hot and the butter has melted. Remove from heat.
  5. Add the milk mixture to the potatoes and mash it together.
  6. Fold in the yogurt until evenly combined and smooth, being careful not to overwork the potatoes. If the potatoes are too thick, add more milk and stir to combine.
  7. Season generously with salt and freshly ground black pepper.


01 February 2010

Jasmine Sticky Rice

Jasmine sticky rice goes well with many types of dishes or all alone at the fridge late at night. Warm or cold. Hard to resist. The sweet counteracts spicy food like this Sri Lankan anchovy dish and the rice pairs well with bright, fruity notes (mango hell yeah!). There are a few easy steps and some waiting around, but this is very easy to make.

Soak. Rinse. Steam.
Heat. Stir. Pour. Rest. MMMmmmm I can almost smell it. So hungry now.

 
Recipe Time: Jasmine Sticky Rice (steam method)
adapted from the Thaitable.com site
serves 4ish

2 Tbs Sugar    
1 Cup Jasmine Rice    
2 pinches Salt    
1 Cup Coconut milk

  1. Cover the rice completely with water and soak from one hour to overnight.
  2. Rinse the rice thoroughly after soaking.
  3. Put water in the bottom of a steamer (or if you're like me and you don't have a steamer, put water in the bottom of a large stock pot with an old, fold-out veggie steamer as a base, then add a metal colander).
  4. Cover the steamer or colander contraption with cheese cloth, muslin cloth, or a plain tea towel.
  5. Add the rice (make sure the towel does not touch the burner) and cover with lid.
  6. Steam on medium to high heat for 20 minutes (or until rice is translucent).
  7. While the rice is steaming...heat the coconut milk in a heavy-bottomed pot over medium heat.
  8. Stir constantly!
  9. Simmer, do not boil.
  10. When the coconut milk starts to simmer add sugar and salt.
  11. Remove from heat.
  12. Pour 3/4 of the hot coconut milk over the hot sticky rice.
  13. Let it sit for 5 minutes.
  14. Drizzle the rest of the coconut milk over the rice when you serve.

10 November 2009

Smoked Paprika and Potato Soup


The last day of the farmers' market is a crazy day. Do we really need more produce if we never can or freeze? But there won't be good tomatoes until next year! It's rainy and cold, no one will be there. My life is a barren wasteland without fresh fruit! But every time I buy onions I get a bad batch. And so on ...but you can never go wrong with potatoes. Unless of course you have too many spuds and not enough space.


I wasn't going to post this recipe since it doesn't "come from somewhere," unless you count my desperate state as a destination, but once I tasted the spicy soup I don't regret only taking pictures at the halfway mark. This is a quick recipe and most of the time takes place in the microwave. The soup is also fairly hands-off except for watching the onions in the beginning and watching the knife when you cut the microwave softened potatoes into large chunks.


The flavor comes from a rough-chopped yellow onion cooked in a few teaspoons of olive oil with smoked paprika, dried parsley, dried thyme, salt and black pepper. Just throw it all in the bottom of your soup pot while you microwave eight medium potatoes (or whatever you've got on hand).


When the potatoes are fork tender carefully remove them from the microwave - those little devilspuds are HOT! The eight potatoes magically equals eight cups. How convenient. After the onions become translucent add four cups of chicken stock and the potato chunks. Let it simmer, check your Facebook, stir it around, get a drink, think about serving it, then decided to blend it with an immersion blender.


less creamy


more creamy
I'm always looking for a reason to use the immersion blender, mainly because it is the one kitchen gadget we own. For creamy but not overly smooth texture I removed roughly a cup of the soup before blending and then added that back to the blended portion. You do whatever makes you happy.

Recipe Time: Smoked Paprika and Potato Soup
serves 8

4 cups organic fat free or low-fat chicken broth
1 cup onions
8 cups potato
1 Tbsp parsley
1 Tbsp dried thyme
1 Tbsp olive oil
2 Tbsp paprika
2 tsp table salt
2 tsp black pepper
  1. Microwave the potatoes until they are fork tender.
  2. While the potatoes are cooking roughly chop the onion.
  3. Cook/sweat the onion in a stock pot with the oil and the seasonings until the onion turns translucent.
  4. Add the chicken stock and simmer.
  5. Cut the cooked potatoes into large chunks.
  6. Add the potatoes to the soup and simmer about 10 minutes.
  7. Eat or blend the soup with an immersion blender for a creamy texture.
Related Posts with Thumbnails